How to automount hard disks on boot in Ubuntu
Automounting hard disks and partitions in Ubuntu
This guide is tested to be working 100% in Ubuntu 18.04, but you should have no problems what-so-ever in Ubuntu 17.10 and above.
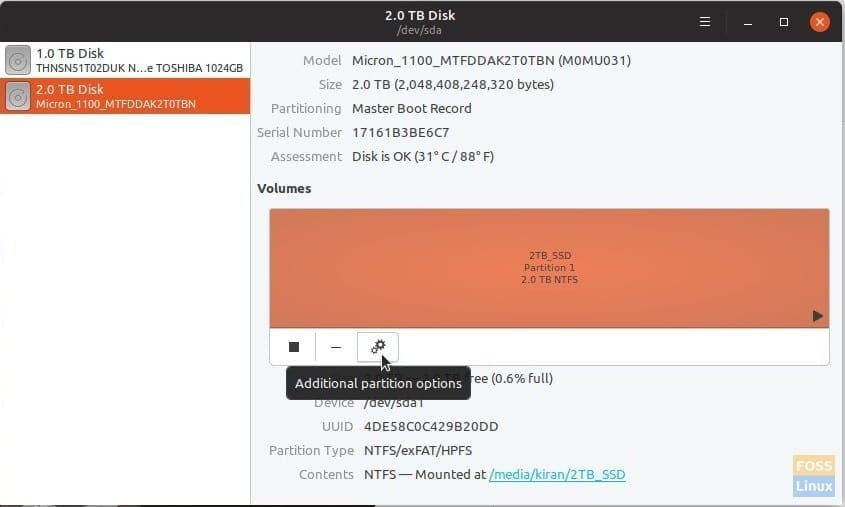
Step 1) Go to “Activities” and launch “Disks”.

Step 2) Select the hard disk or the partition in the left pane and then click on the “Additional partition options” which is represented by the gear icon.

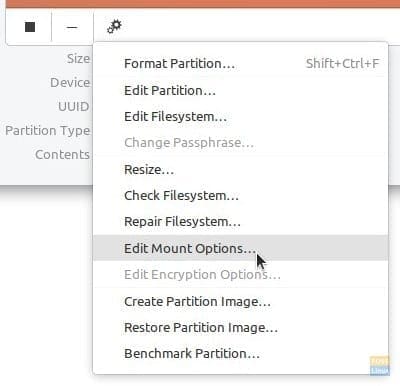
Step 3) Select “Edit Mount Options…”.

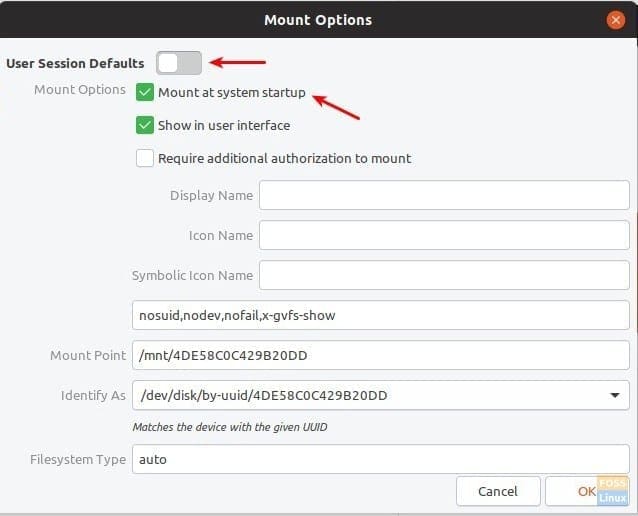
Step 4) Toggle the “User Session Defaults” option to OFF.
Step 5) Check the box “Mount at system startup”. Make sure “Show in the user interface” is also checked.

Step 6) Click “OK”.
That’s it. Next time you boot the computer, you should see the partition automounted.
Adding additional authorization to mount
In case you wanted a layer of security and would like to set up authorization for mounting a hard disk or a partition, you can do that too from the “Disks” utility.
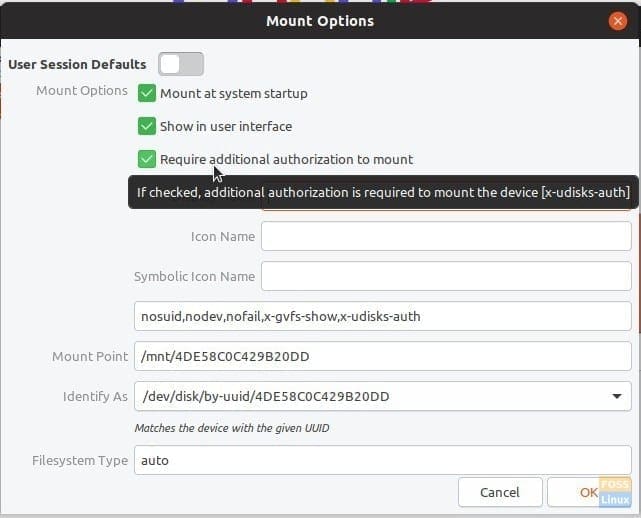
While in the “Mount Options” menu, check the box “Require additional authorization to mount”. You must enter a password to complete the setup.

Note that this authorization is only applicable to non-administrators of the PC. Admin user will be able to mount the partition without needing to enter the password. This also means that if there is only one account in your PC, which implies it’s that of the administrator, this setting has no effect.
Source : https://www.fosslinux.com/4216/how-to-automount-hard-disk-partitions-in-ubuntu.htm
Posted on: May 28, 2019, by : Julian's | 55 views